
Figure Drawing Class


I spent this past weekend learning how to work with leather at the Textile Arts Center. Our excellent teacher, Kat Roberts taught our 9-student class how to make patterns, and turn them into handmade leather pieces by way of 3 projects. Here are my results:
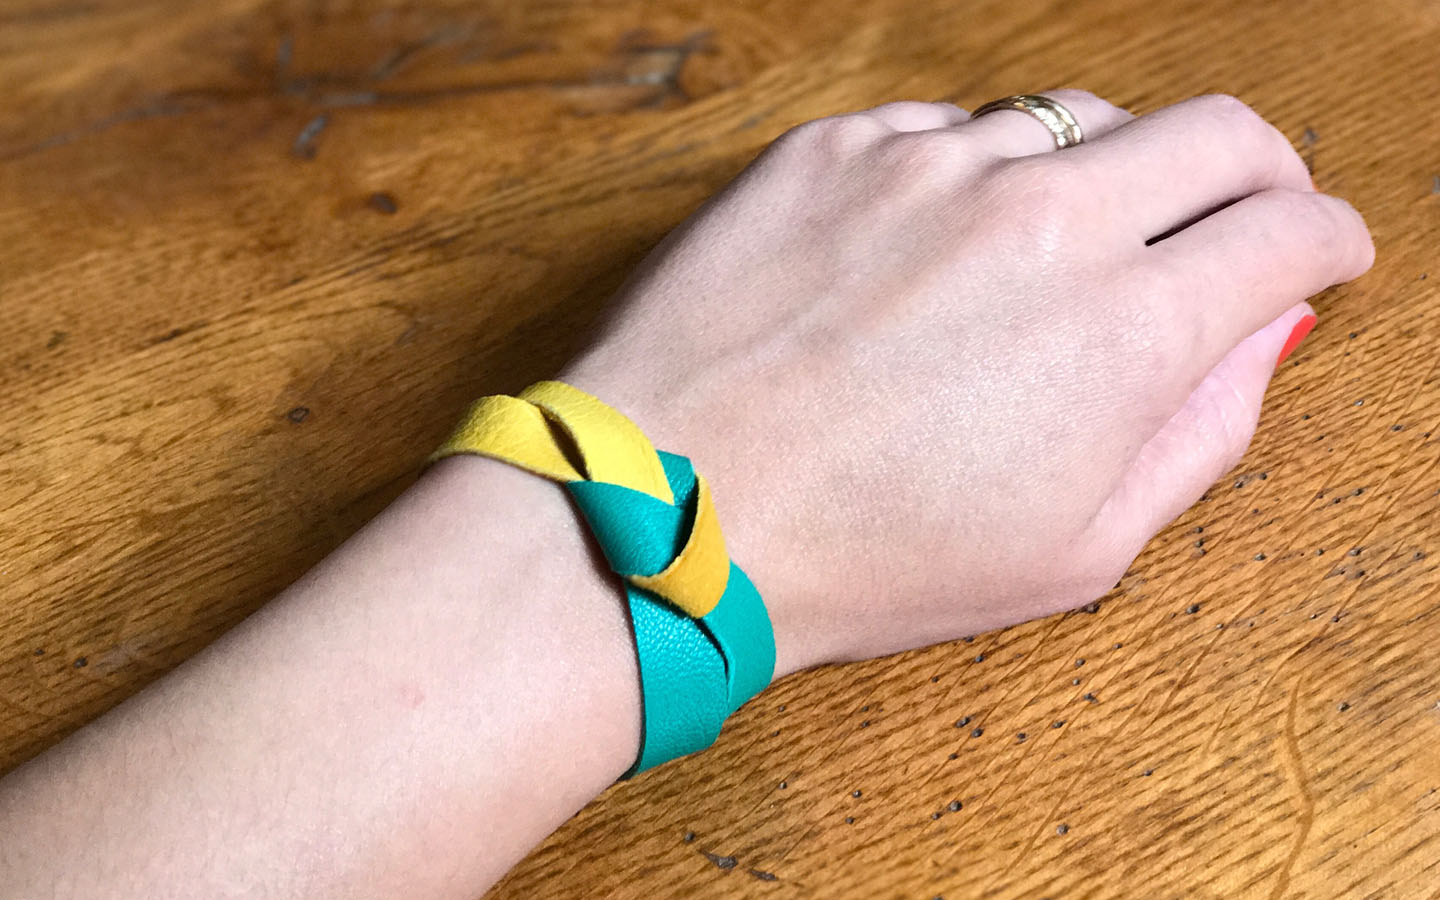
Our first project was to design a cuff because it lays flat, but changes shape on your wrist. My pattern was loosely based on my favorite metal puzzle bracelet from Erica Weiner, but the scrap bin was full of so many bright, soft leathers that I had to make it two tone.
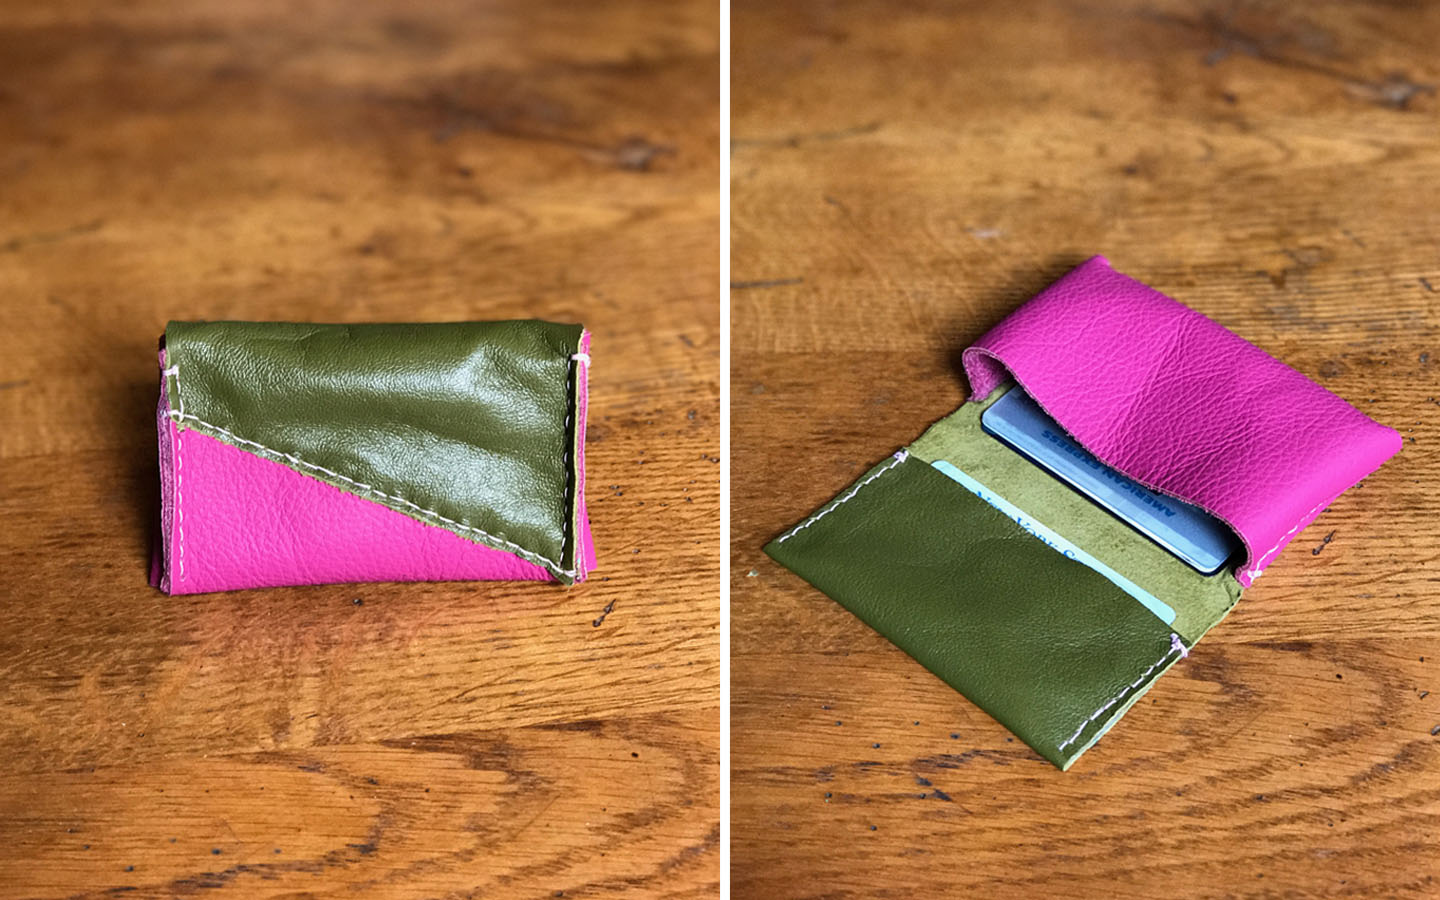
For our second project, I thought I’d make a simple wallet. The pattern I designed only called for one piece of leather, but I was still too excited about all the colors, so it ended up a lot more 80’s than I intended…
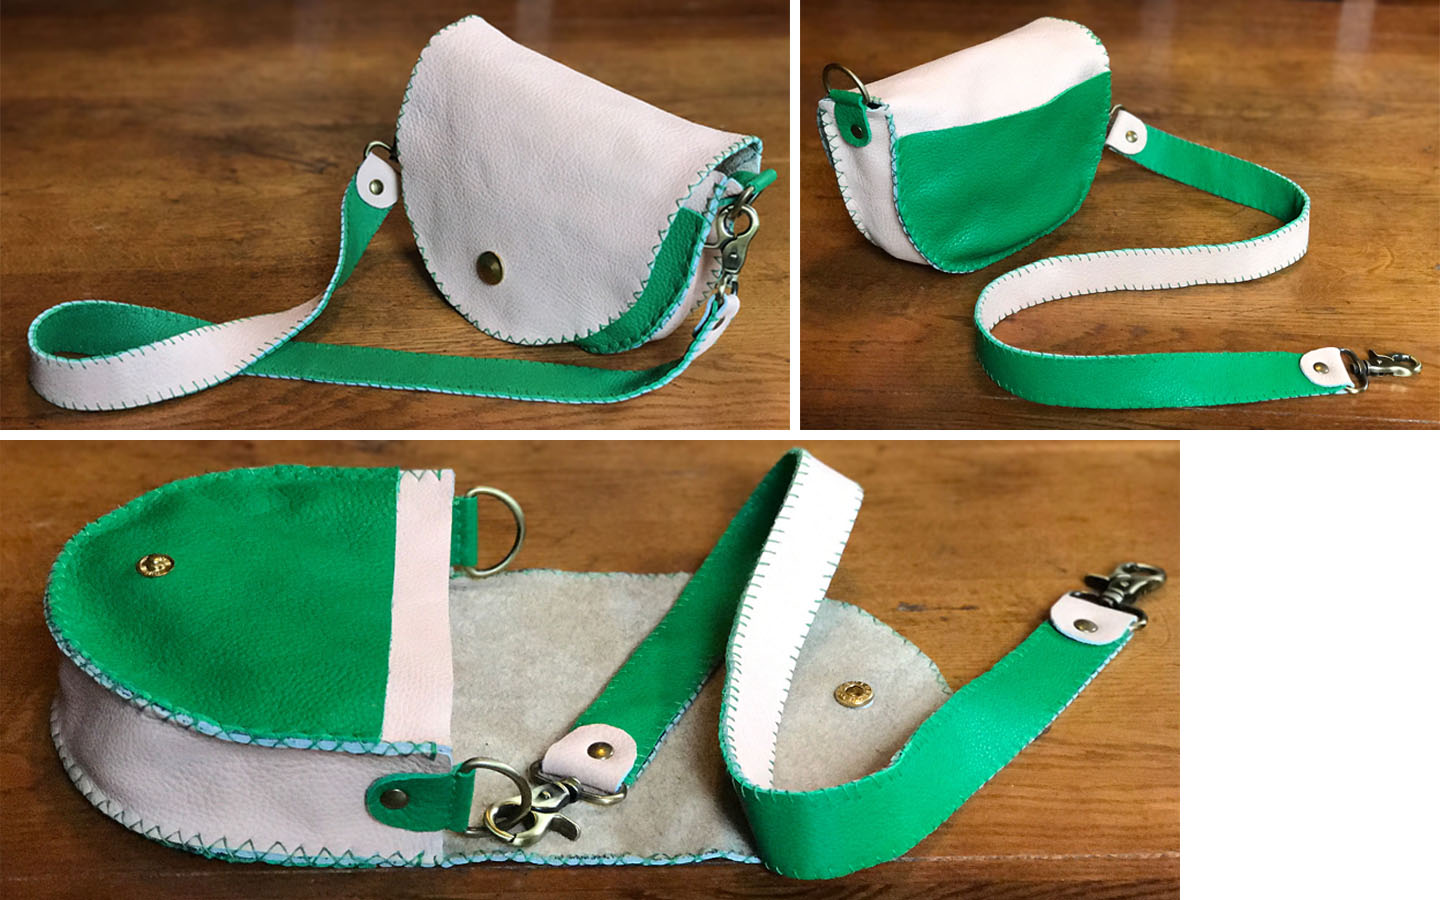
At this point I had to keep my two-color theme. I opted for a very small purse, and picked out a desert theme in anticipation for our upcoming trip to New Mexico.

I found some reversible fabric, and matching cord that I couldn’t pass up, and made a little backpack/purse.

We have no shortage of reusable tote bags around the house, but sometimes you just need a backpack… this gave me an idea…
To test out my theory, I found a cool looking, sturdy, and very cheap, tote bag at Uniqlo.
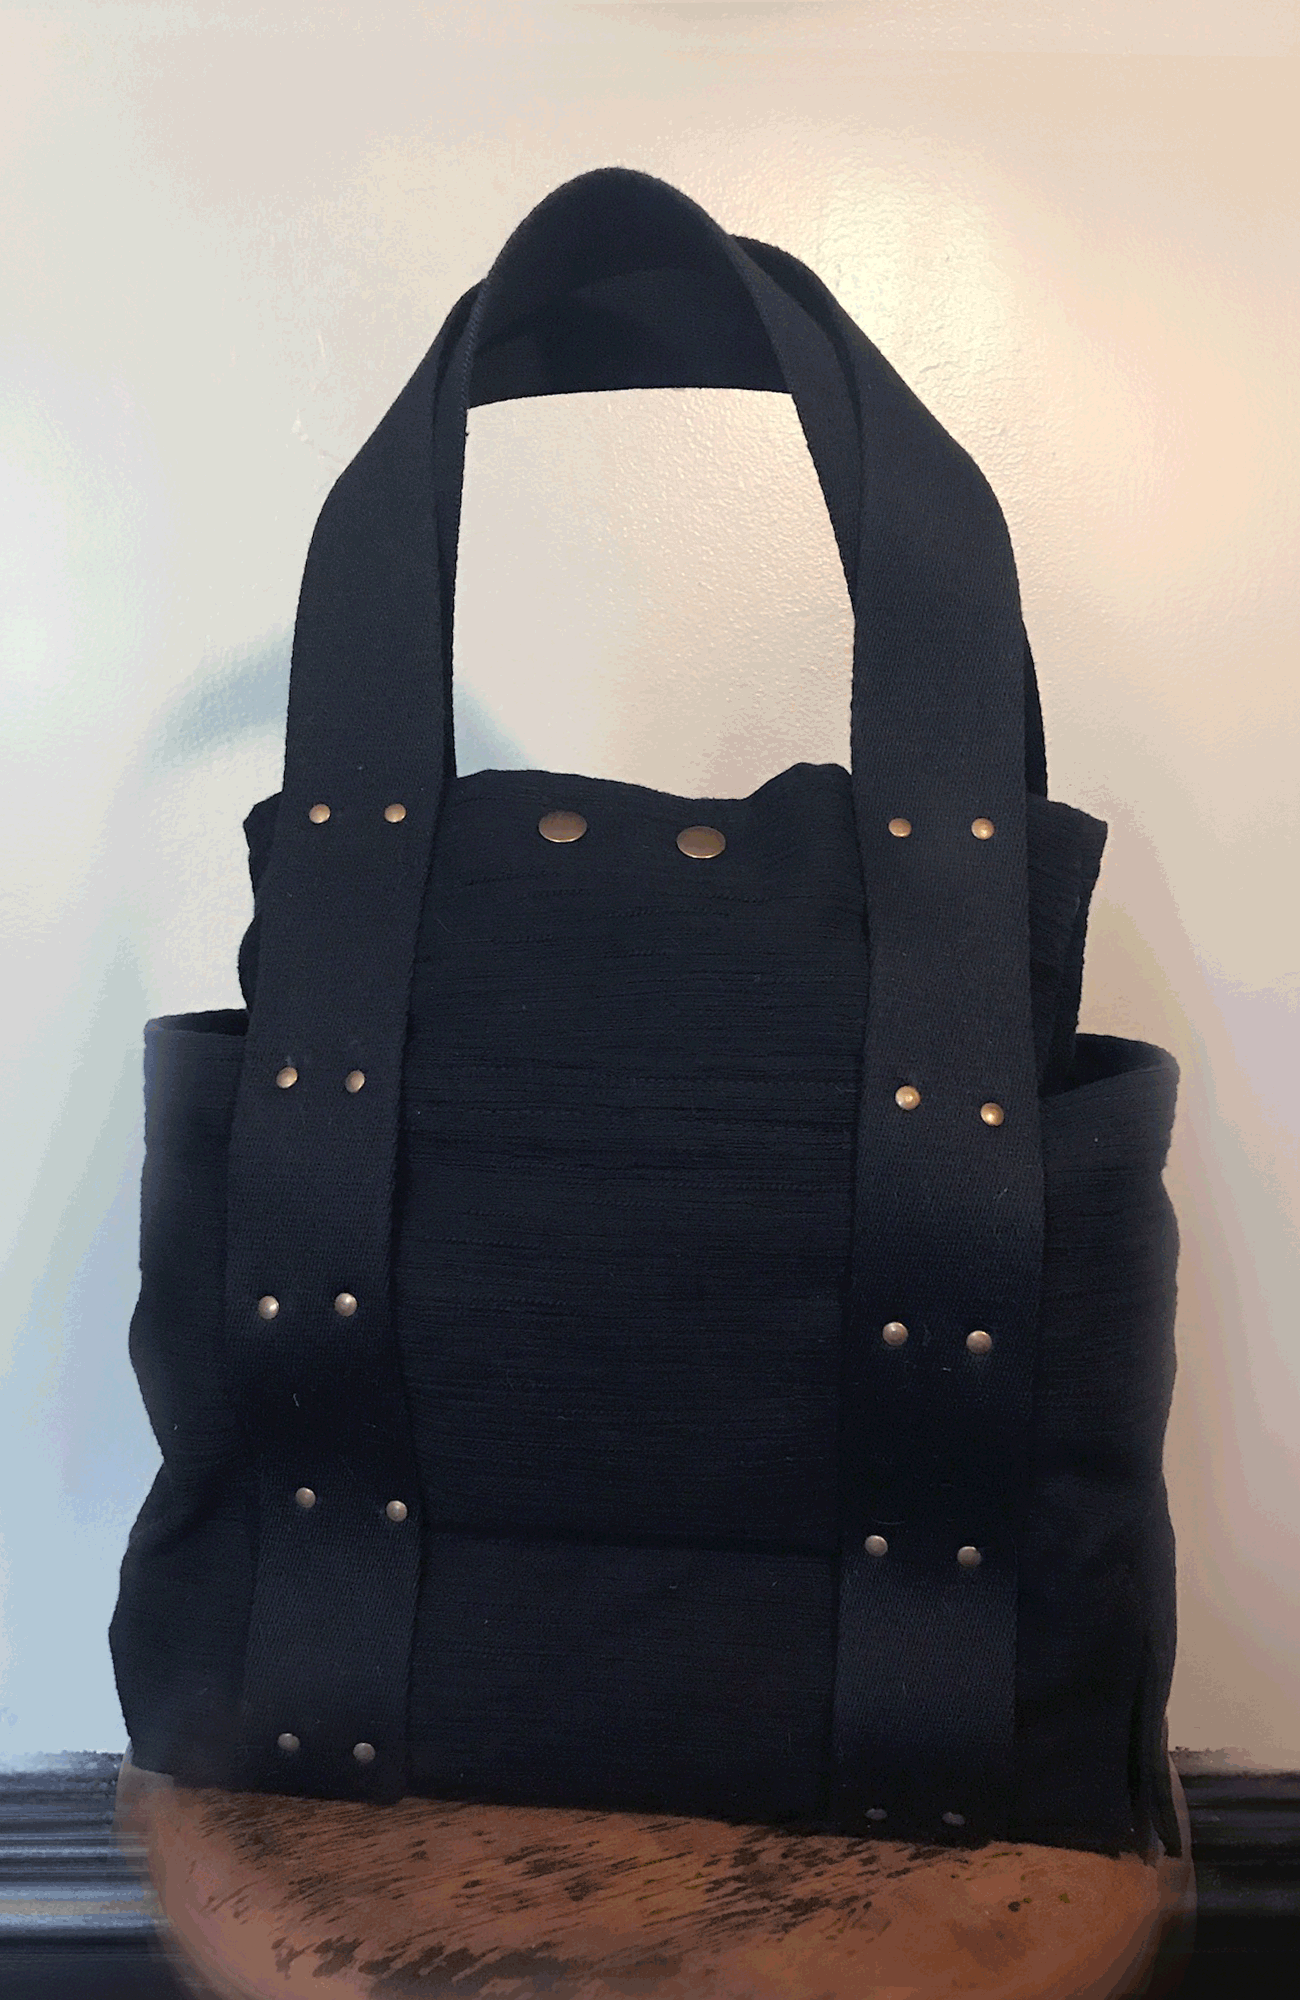
But first! The first test: I removed the straps from an old, rarely used, hot pink tote bag, and reattached them with rivets.
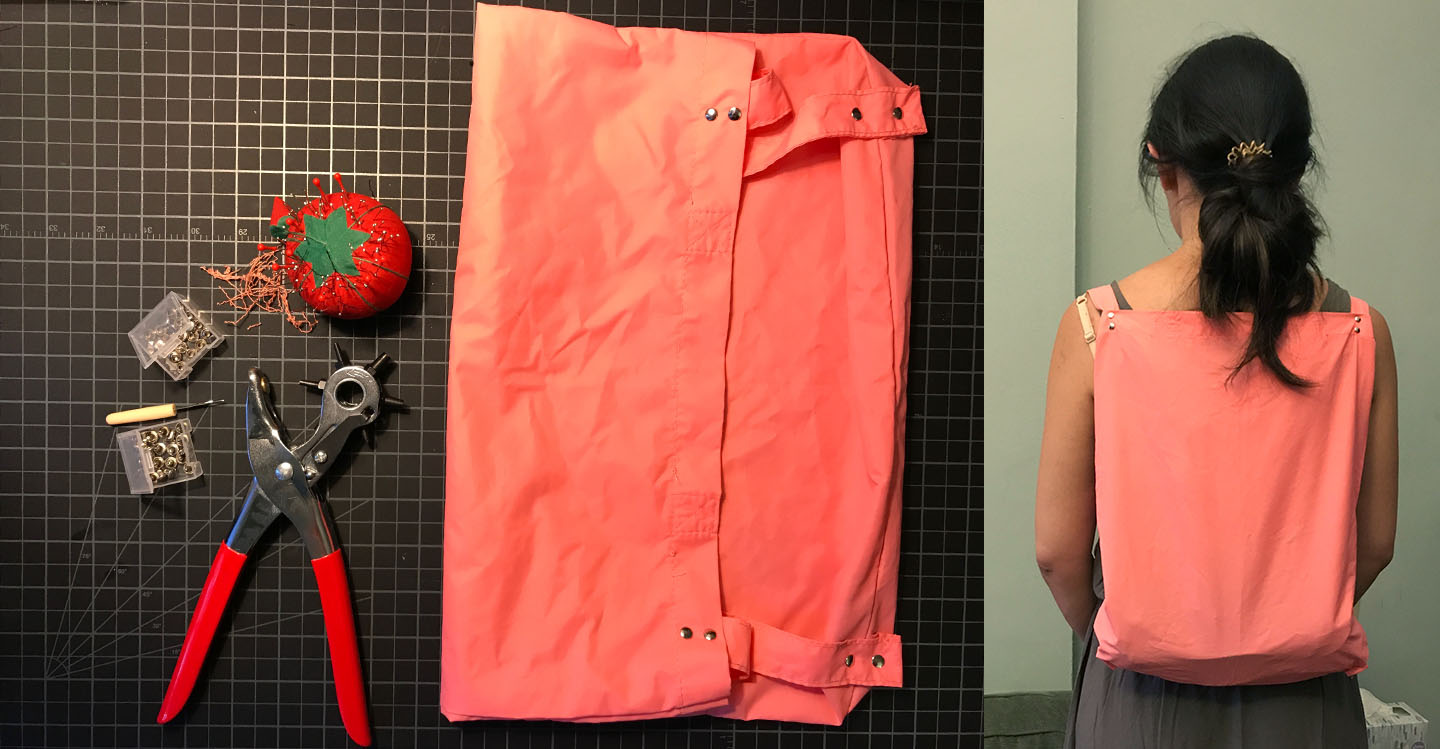
The straps were a tad short, and it needed a closure of some kind, but overall, it worked as planned!
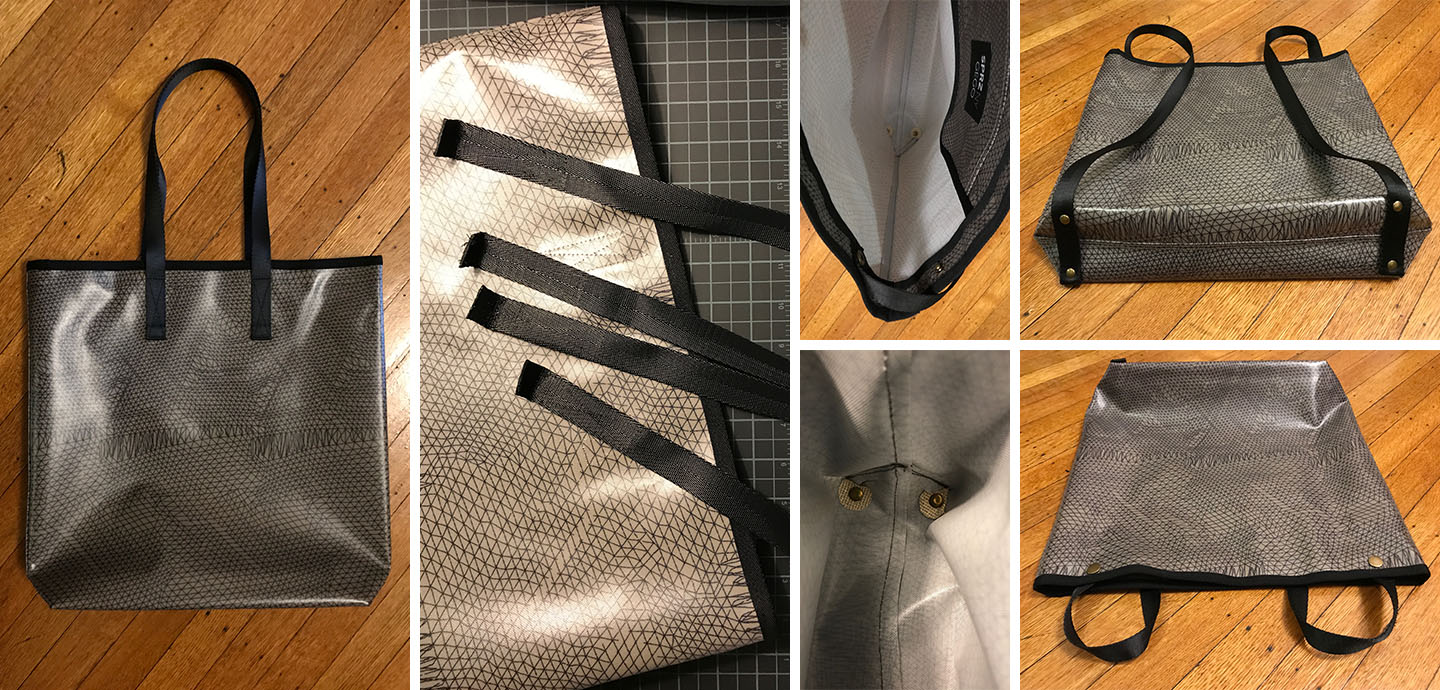
On to the Uniqlo bag!
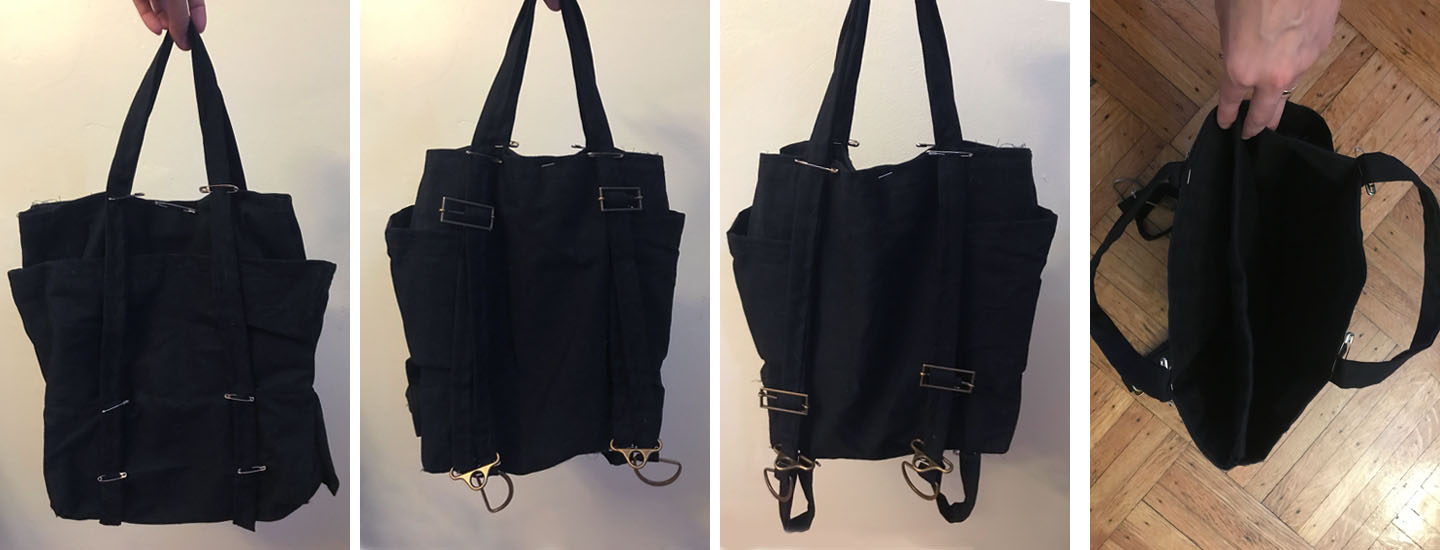
I carefully removed the stitching from the straps, and reattached them with snaps on the front top opening to add some security, and rivets (with little reinforcement circles) on the bottom. Hooray!

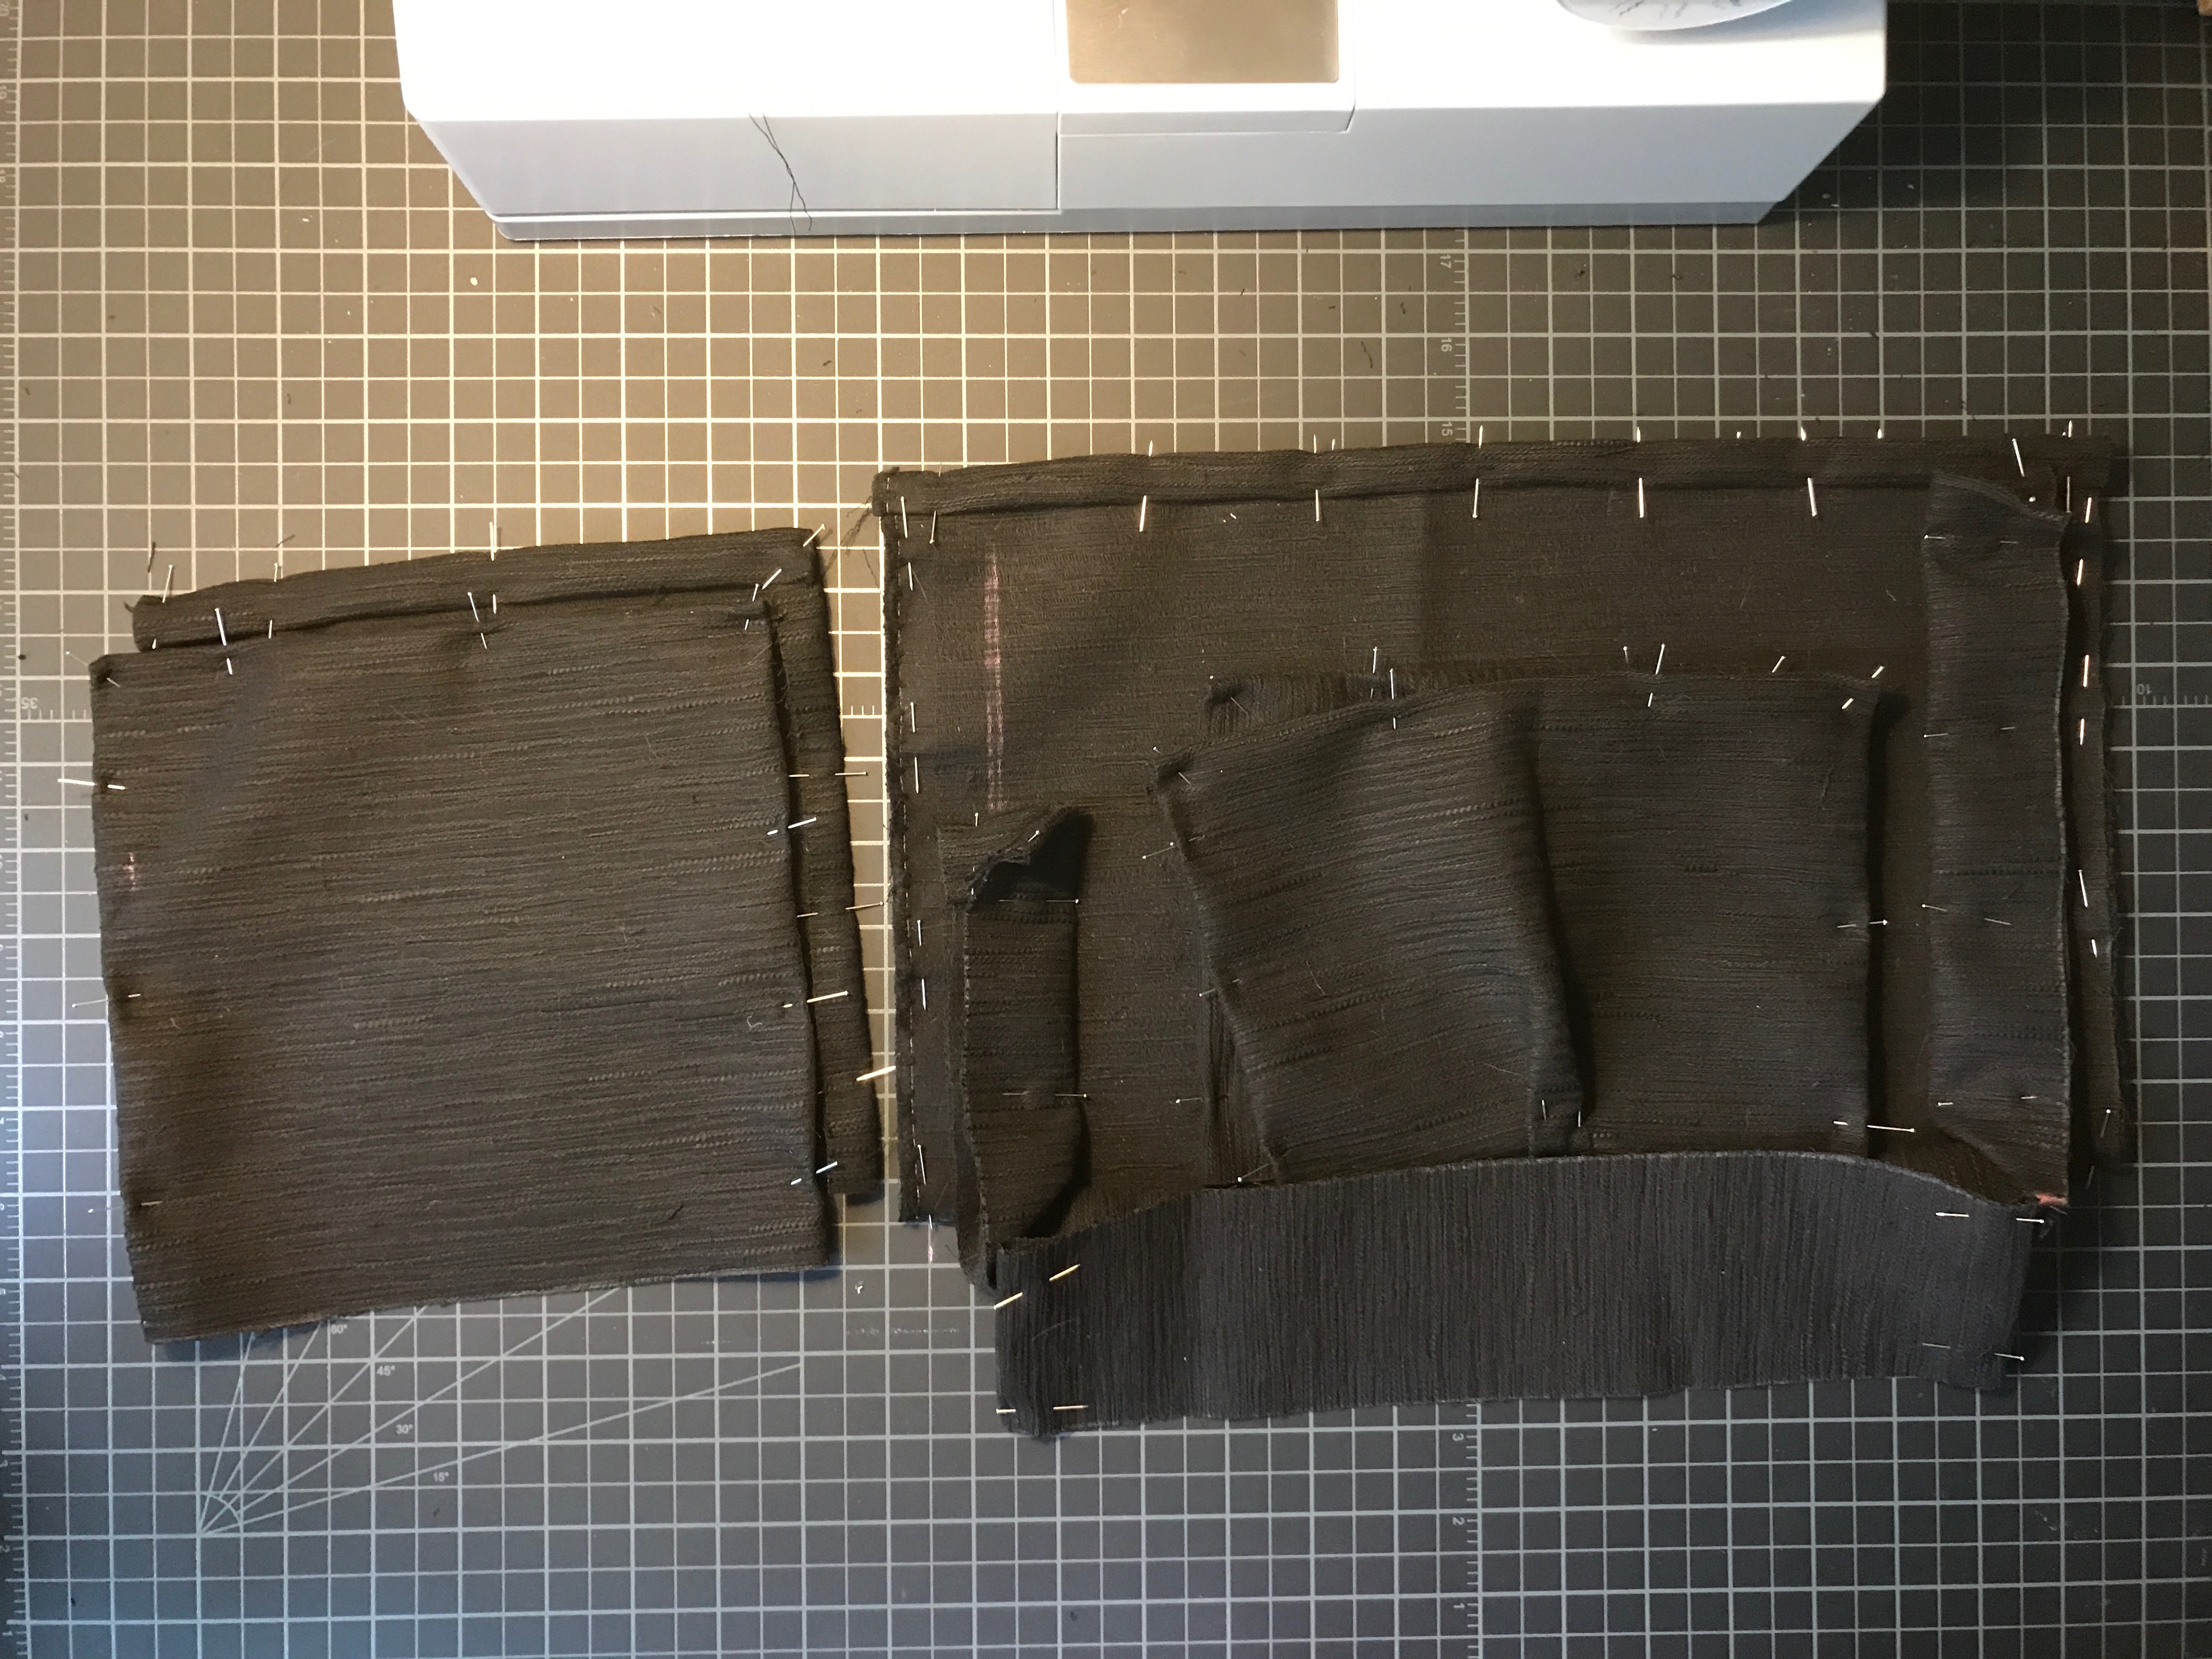
I spent so much time designing and redesigning the back-tote (Version 1) that I wanted to just wing it on my second bag. Using the fabric scraps from the last one, I made one quick sketch of a tiny tote, and got to work.
Working on a grid made it a lot easier to make all my unmeasured pieces line up.
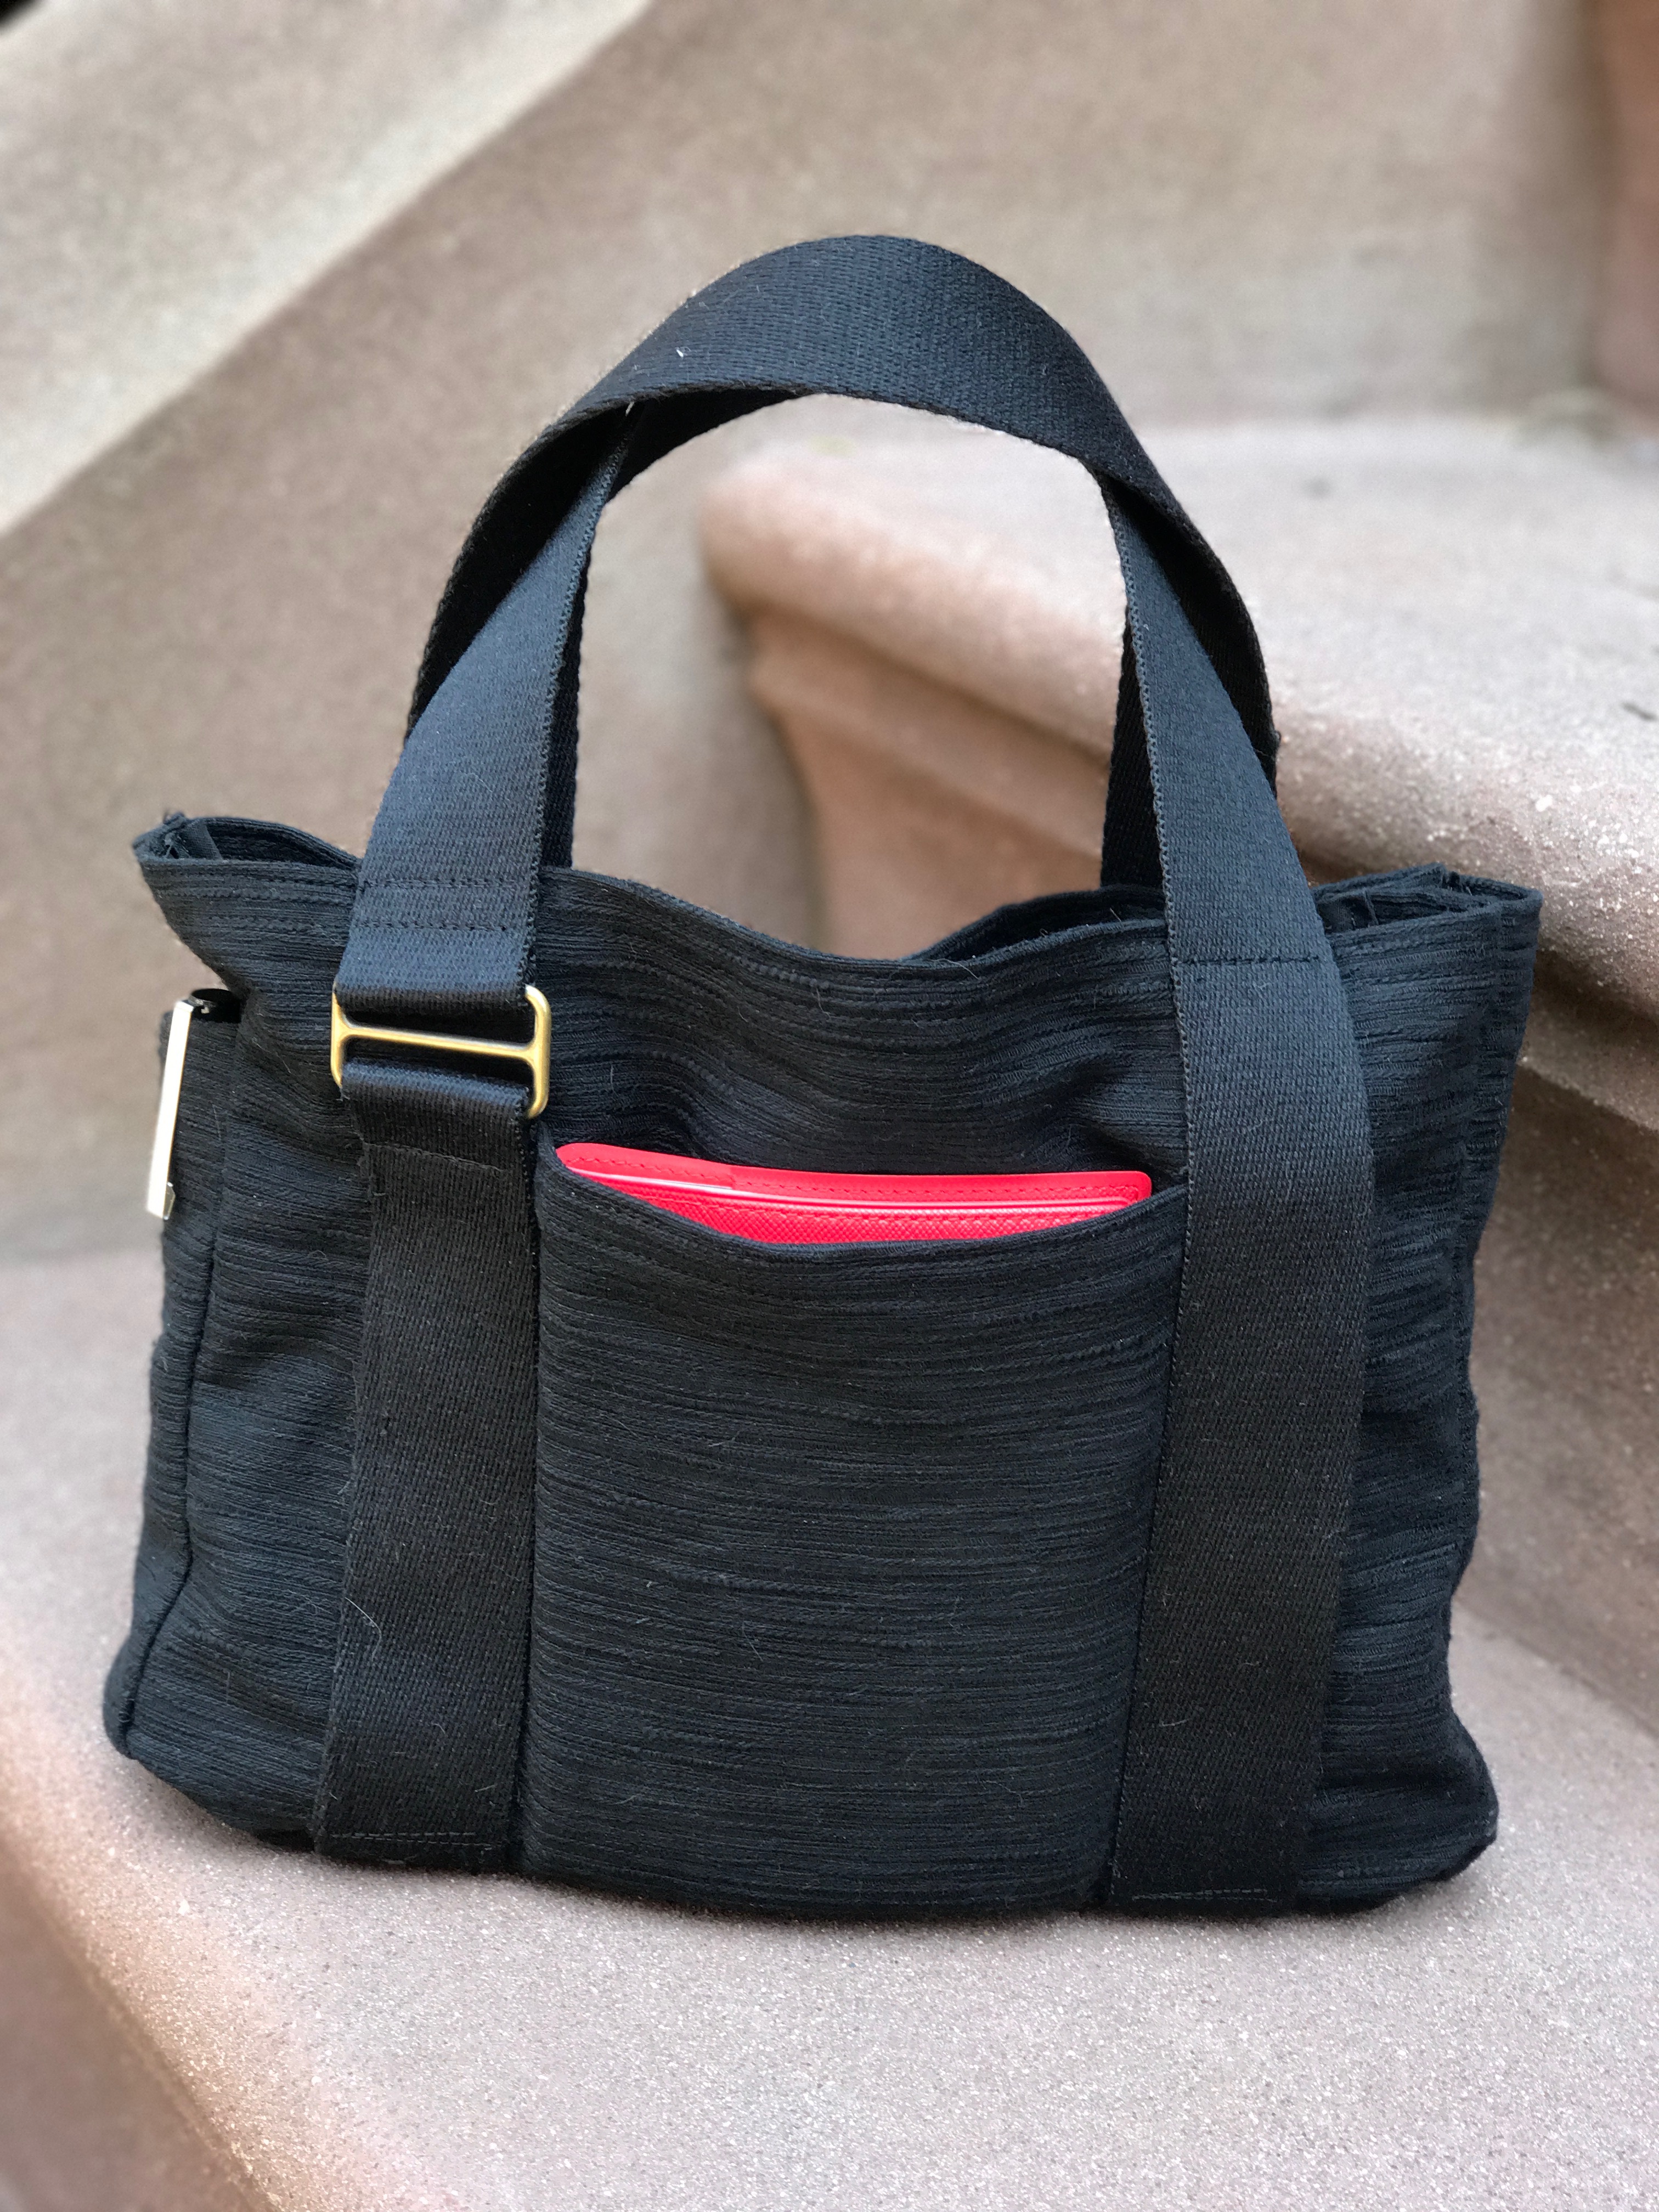
The end result included two large outer pockets, two awkwardly-sized pen/chopstick pockets, and two inner pockets (one with a gusset).

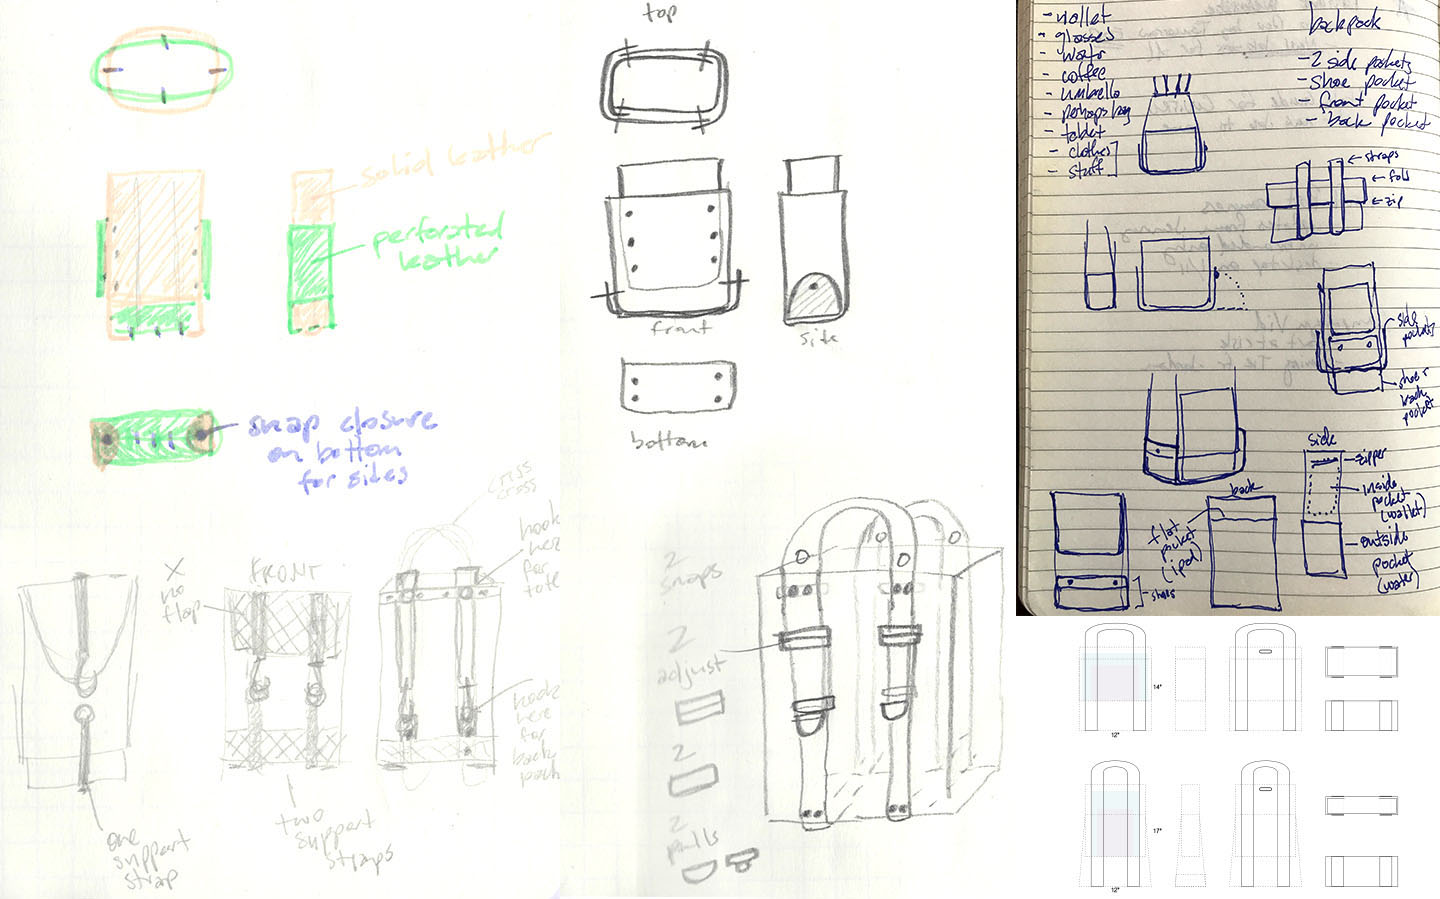
I decided that I needed to make a backpack/totebag. I wanted it to have:
– two side pockets for water/wallets/etc
– a front pocket for quick access things
– a separate area for shoes/umbrellas
– straps that transition from a tote to a backpack
I wanted to combine the functionality of my Marmot Urban Hauler and the looks of my collection of bags from Flux, and add a shoe compartment. (hahaha) Needless to say, after three rounds of this first version, I have a very, very long way to go.
I started sketching this months ago. Here are a few…
A few evolved into cute little paper comps…
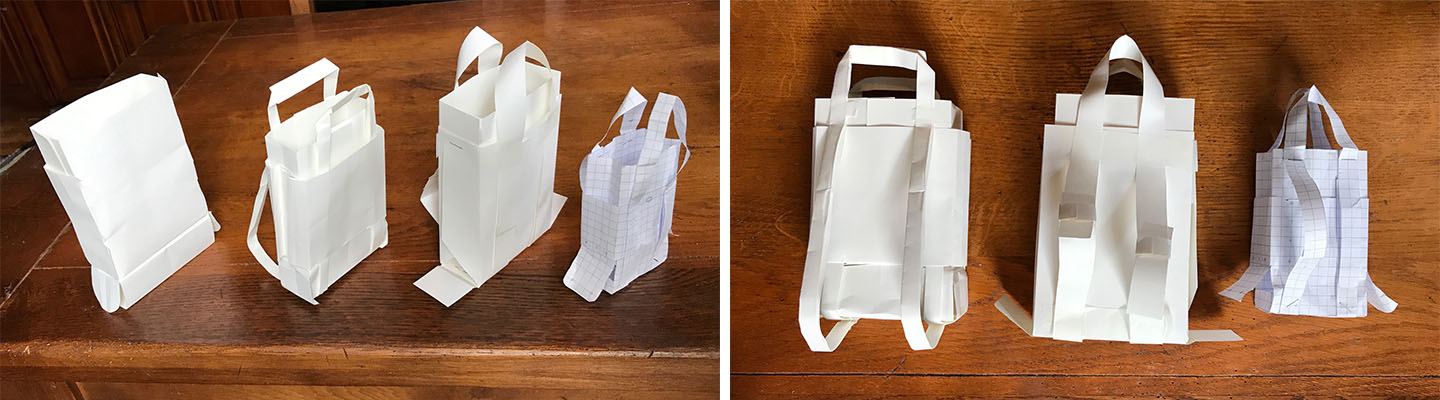
The last comp seemed perfect, and was to scale once I switched to graph paper, so I jumped right in with the nice, expensive, textured canvas that I picked out at Mood.
This was a terrible idea. Number 1, my child-sized sewing machine was not prepared for this, number 2, neither was I.
While it looks neat in the photo, this version involved a lot of no-sew iron-on tape. After pinning on the straps and trying it on, I decided that the size was much too big for me. I wanted to modify the size, and the way some of the pockets functioned. However, modifying anything assembled with no-sew tape is not ideal…
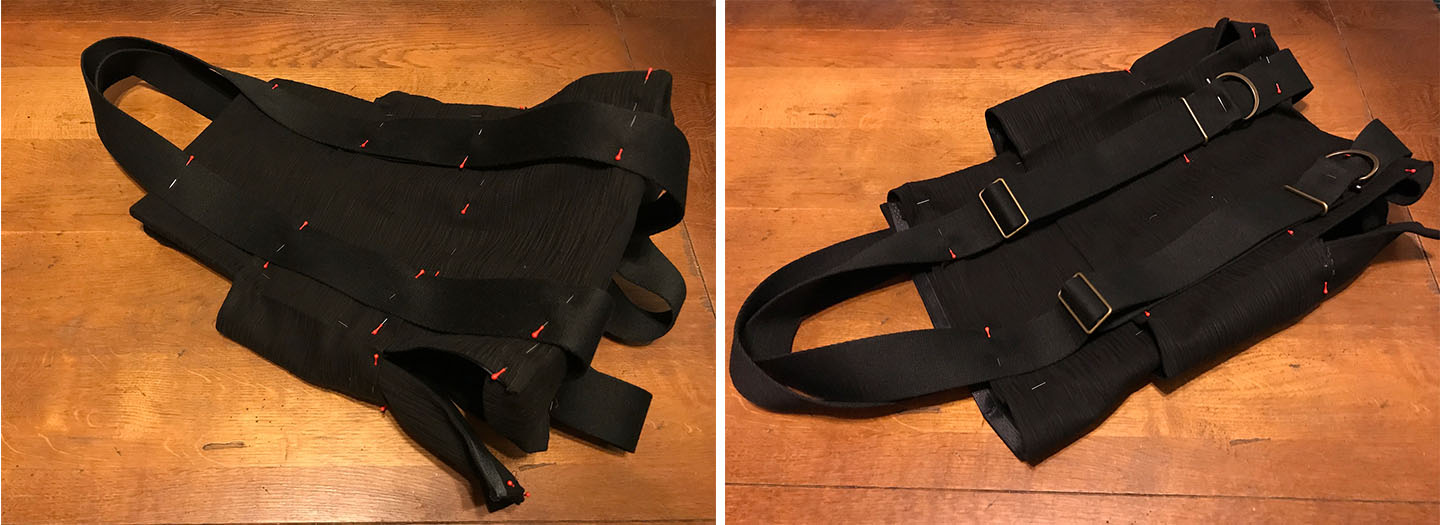
For version 1.2, I wised up, got a new sewing machine, built to handle thick canvas, and found some scrap fabric to try out the new “pattern.” Here it is with safety pinned straps:
The trial bag seemed to work, and was a much more reasonable size for me, so again, I tried it out with the nice fabric. Once the bag was sewn, I set about attaching the straps. Not learning from my previous mistake, this is when I learned how to set rivets…
 Overall, I’m pretty pleased with the results of this first bag experiment. But, Version 2 will be much better.
